MakeCode Arcade is a fun and easy-to-use tool that lets us create our own arcade games. It's like a digital playground where we can build and play games right in our web browser.
With MakeCode, we can use colourful blocks to build our games, just like Scratch.
If you have a small handheld gaming computer like the BrainPad or GameGo, you can even put the games you make onto it and play them anywhere!
Imagine the MakeCode Arcade code editor as a magical toolbox. It's a lot like the Microbit and Scratch editors you might have used before. Here's what it has:
Let's create our first project!
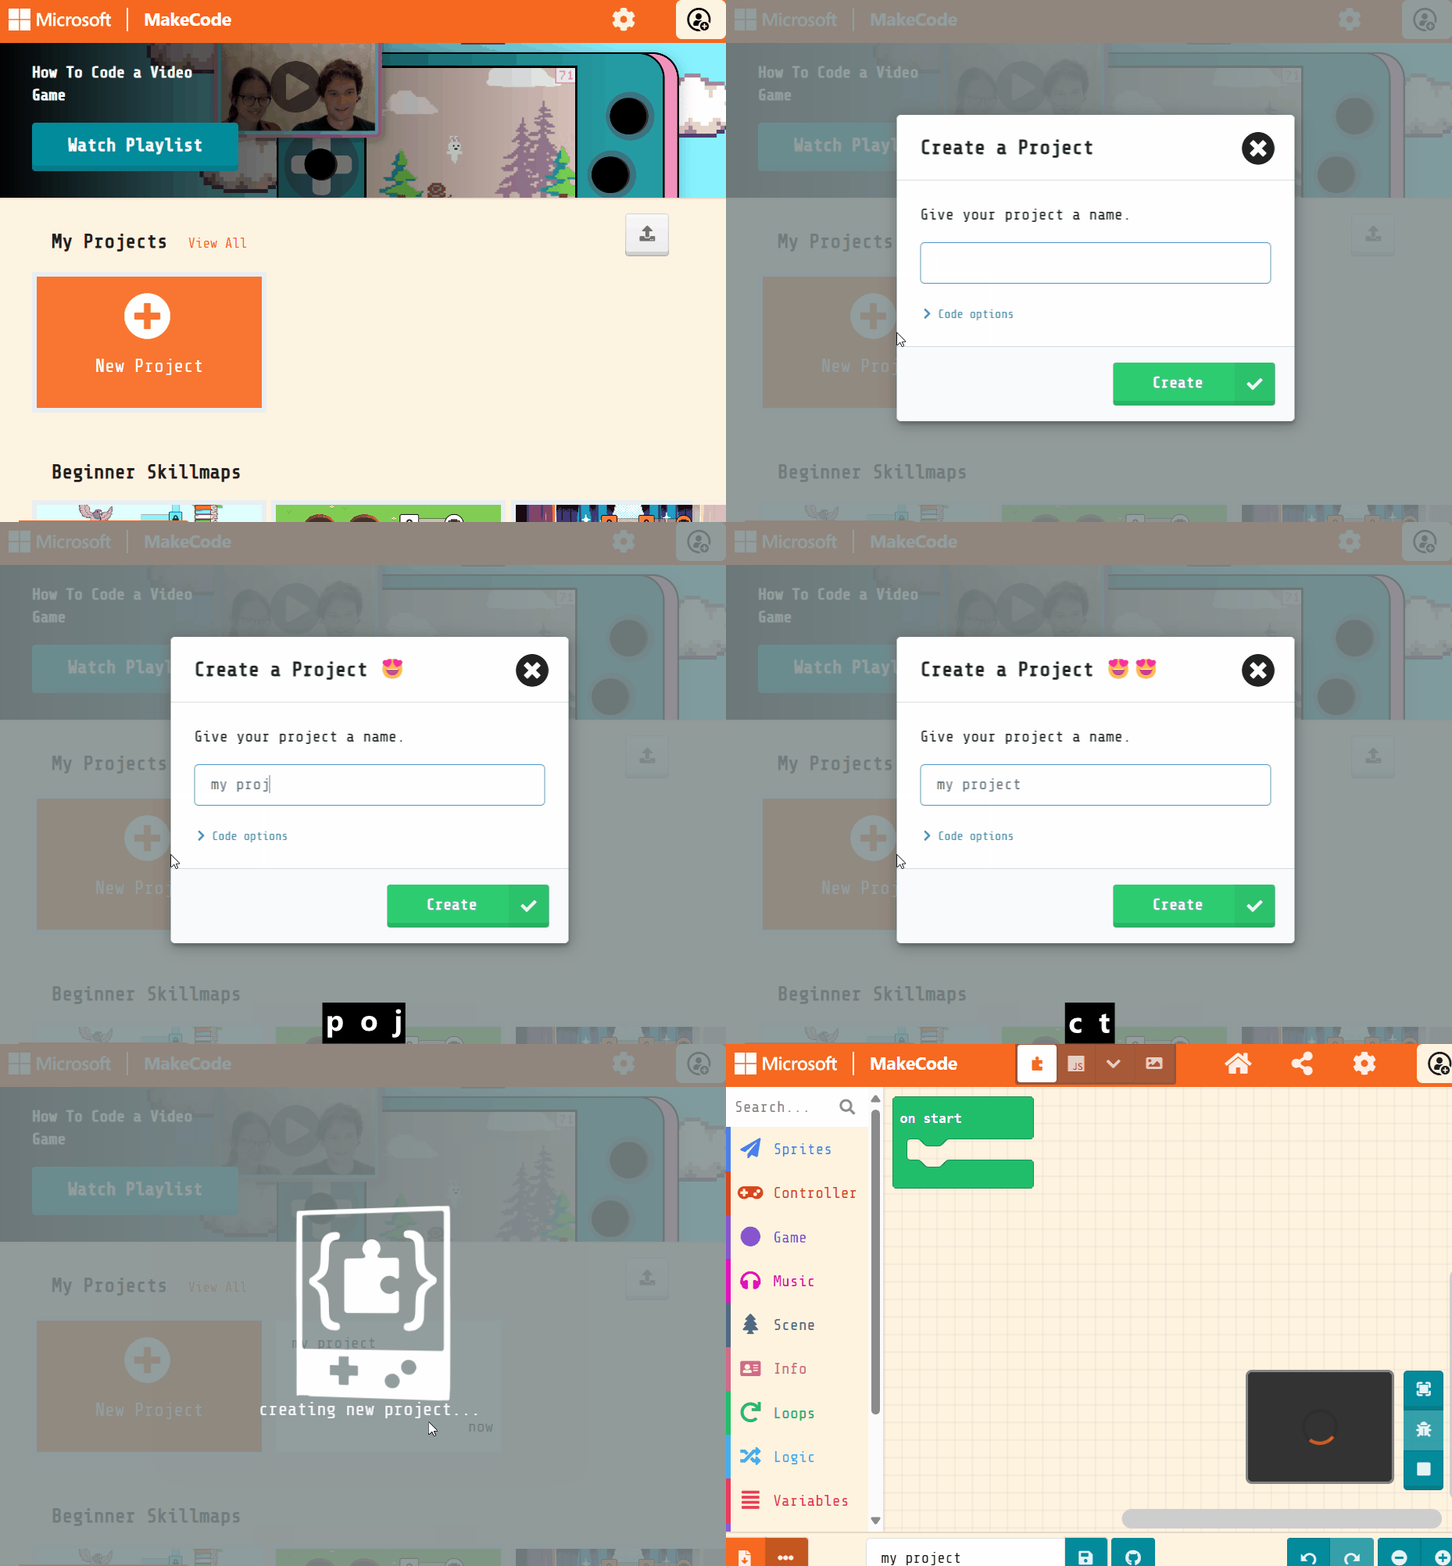
Go to the Arcade MakeCode website and create a new project. You can call your project anything you want!
Create a new Arcade project using the makecode.com website.
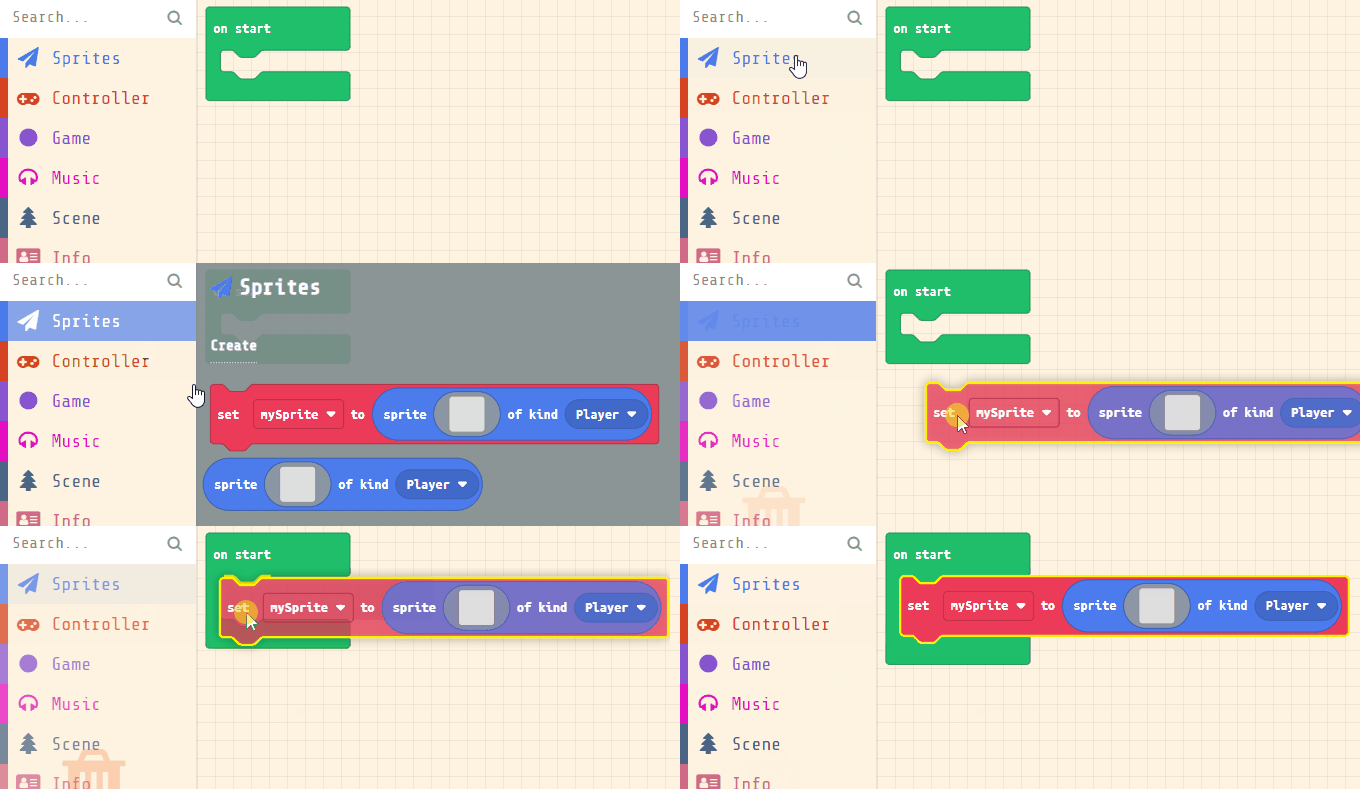
When we add a sprite to an Arcade project, we add it by putting it into a variable. We normally use variables to store numbers and text but we can also put more complicated things in them like sprites!
Add the following code to your project.
let mySprite = sprites.create(img`
. . . . . . . . . . . . . . . .
. . . . . . . . . . . . . . . .
. . . . . . . . . . . . . . . .
. . . . . . . . . . . . . . . .
. . . . . . . . . . . . . . . .
. . . . . . . . . . . . . . . .
. . . . . . . . . . . . . . . .
. . . . . . . . . . . . . . . .
. . . . . . . . . . . . . . . .
. . . . . . . . . . . . . . . .
. . . . . . . . . . . . . . . .
. . . . . . . . . . . . . . . .
. . . . . . . . . . . . . . . .
. . . . . . . . . . . . . . . .
. . . . . . . . . . . . . . . .
. . . . . . . . . . . . . . . .
`, SpriteKind.Player)
This creates a variable called 'mySprite' and stores a sprite of kind Player in the variable. There are different types of sprites such as:
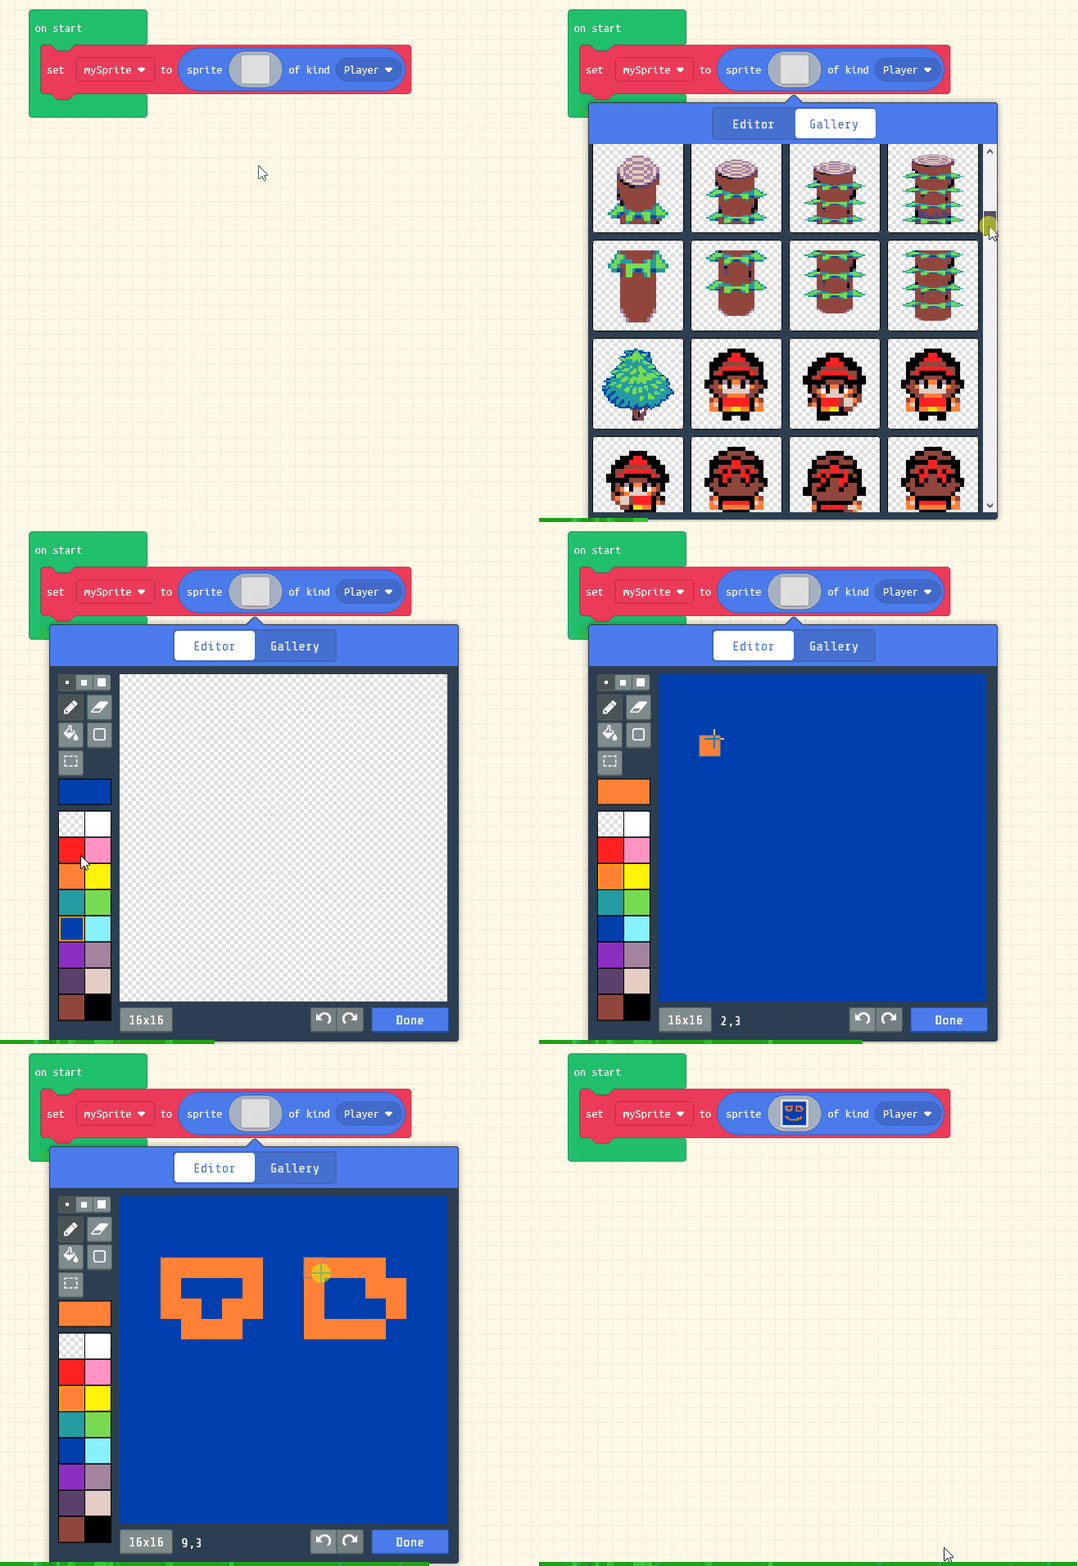
Click on the gray box in the sprite block to open the Editor. You can choose a sprite from the Gallery or you can paint your own sprite using the Editor.
You can paint and design your own sprite or you can choose one from the gallery. For now choose a sprite from the gallery.
let mySprite = sprites.create(img`
. . . . . . f f f f . . . . . .
. . . . f f f 2 2 f f f . . . .
. . . f f f 2 2 2 2 f f f . . .
. . f f f e e e e e e f f f . .
. . f f e 2 2 2 2 2 2 e e f . .
. . f e 2 f f f f f f 2 e f . .
. . f f f f e e e e f f f f . .
. f f e f b f 4 4 f b f e f f .
. f e e 4 1 f d d f 1 4 e e f .
. . f e e d d d d d d e e f . .
. . . f e e 4 4 4 4 e e f . . .
. . e 4 f 2 2 2 2 2 2 f 4 e . .
. . 4 d f 2 2 2 2 2 2 f d 4 . .
. . 4 4 f 4 4 5 5 4 4 f 4 4 . .
. . . . . f f f f f f . . . . .
. . . . . f f . . f f . . . . .
`, SpriteKind.Player)
In Arcade we have a total of eight buttons (4 directions, A, B, MENU and RESET) and we can program each of these.
Arcade also comes with useful blocks that let's us program somethings quickly. Add the following new code block to your project to program your sprite to move with the up, down, left and right buttons.
let mySprite = sprites.create(img`
. . . . . . f f f f . . . . . .
. . . . f f f 2 2 f f f . . . .
. . . f f f 2 2 2 2 f f f . . .
. . f f f e e e e e e f f f . .
. . f f e 2 2 2 2 2 2 e e f . .
. . f e 2 f f f f f f 2 e f . .
. . f f f f e e e e f f f f . .
. f f e f b f 4 4 f b f e f f .
. f e e 4 1 f d d f 1 4 e e f .
. . f e e d d d d d d e e f . .
. . . f e e 4 4 4 4 e e f . . .
. . e 4 f 2 2 2 2 2 2 f 4 e . .
. . 4 d f 2 2 2 2 2 2 f d 4 . .
. . 4 4 f 4 4 5 5 4 4 f 4 4 . .
. . . . . f f f f f f . . . . .
. . . . . f f . . f f . . . . .
`, SpriteKind.Player)
controller.moveSprite(mySprite)
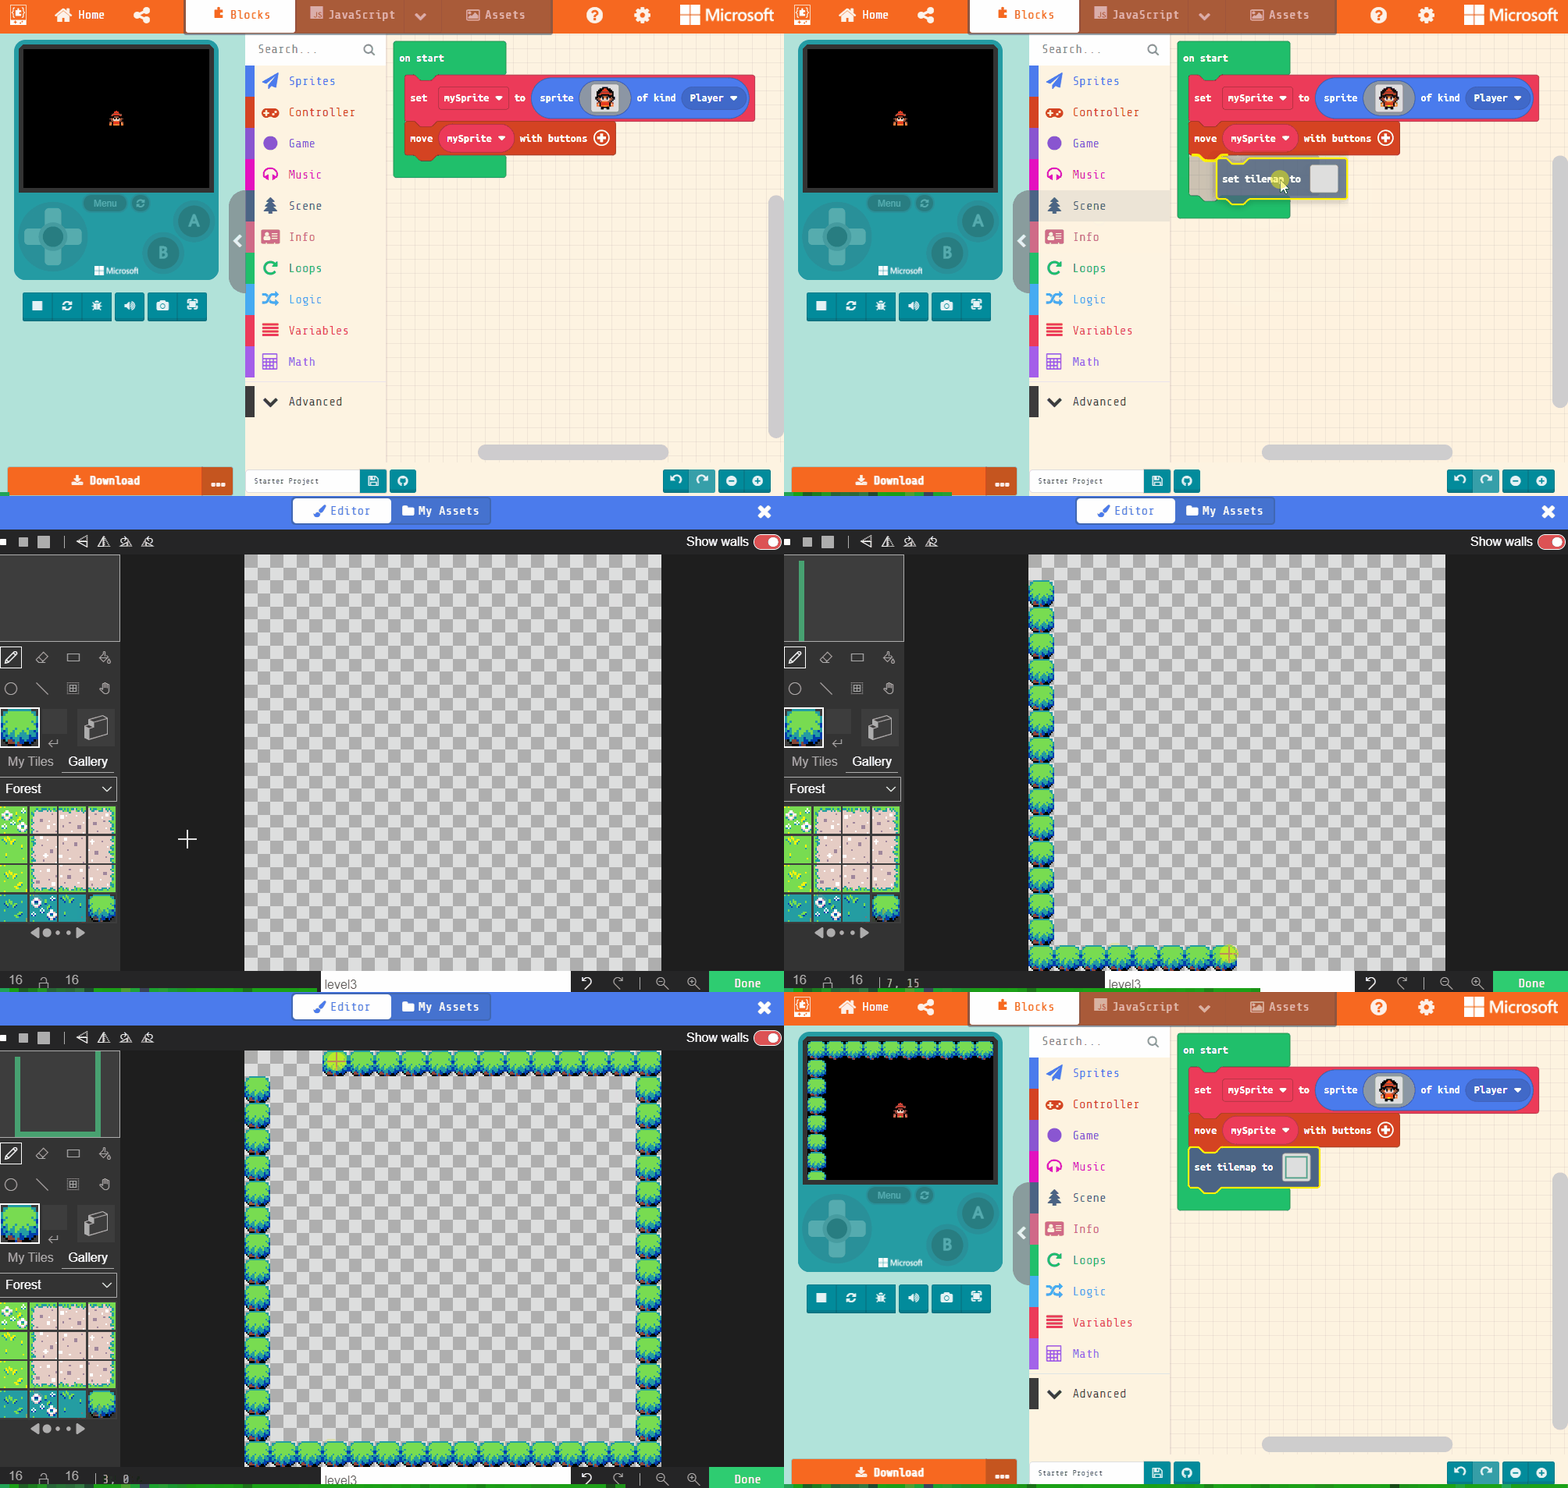
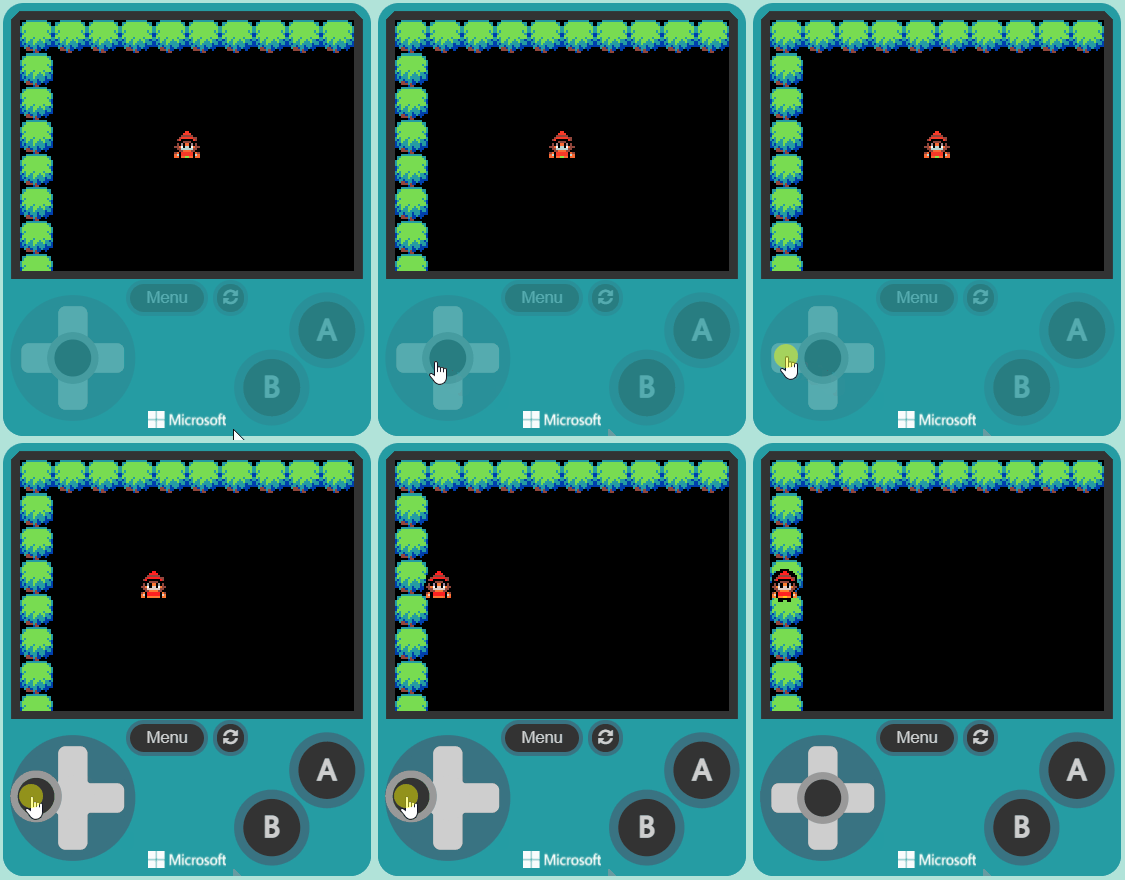
In Arcade we can create tile maps that our players can move around and through.
Add the following new code block and then go into the editor to draw a simple map that just has a border all the way around the edge.
let mySprite = sprites.create(img`
. . . . . . f f f f . . . . . .
. . . . f f f 2 2 f f f . . . .
. . . f f f 2 2 2 2 f f f . . .
. . f f f e e e e e e f f f . .
. . f f e 2 2 2 2 2 2 e e f . .
. . f e 2 f f f f f f 2 e f . .
. . f f f f e e e e f f f f . .
. f f e f b f 4 4 f b f e f f .
. f e e 4 1 f d d f 1 4 e e f .
. . f e e d d d d d d e e f . .
. . . f e e 4 4 4 4 e e f . . .
. . e 4 f 2 2 2 2 2 2 f 4 e . .
. . 4 d f 2 2 2 2 2 2 f d 4 . .
. . 4 4 f 4 4 5 5 4 4 f 4 4 . .
. . . . . f f f f f f . . . . .
. . . . . f f . . f f . . . . .
`, SpriteKind.Player)
controller.moveSprite(mySprite)
tiles.setTilemap(tilemap`level3`)
A wall in Arcade is a tile that you cannot move through. We draw the walls separately using the editor.
Open the editor again but this time choose the 'Draw Walls' tool. Then draw walls over the tiles that you drew in the previous step.
At the moment when you move down your sprite will move off the screen. This is because the tile map is bigger than the screen.
Add the following new code block to make the camera follow your sprite as you move around the tile map.
let mySprite = sprites.create(img`
. . . . . . f f f f . . . . . .
. . . . f f f 2 2 f f f . . . .
. . . f f f 2 2 2 2 f f f . . .
. . f f f e e e e e e f f f . .
. . f f e 2 2 2 2 2 2 e e f . .
. . f e 2 f f f f f f 2 e f . .
. . f f f f e e e e f f f f . .
. f f e f b f 4 4 f b f e f f .
. f e e 4 1 f d d f 1 4 e e f .
. . f e e d d d d d d e e f . .
. . . f e e 4 4 4 4 e e f . . .
. . e 4 f 2 2 2 2 2 2 f 4 e . .
. . 4 d f 2 2 2 2 2 2 f d 4 . .
. . 4 4 f 4 4 5 5 4 4 f 4 4 . .
. . . . . f f f f f f . . . . .
. . . . . f f . . f f . . . . .
`, SpriteKind.Player)
controller.moveSprite(mySprite)
tiles.setTilemap(tilemap`level3`)
scene.cameraFollowSprite(mySprite)
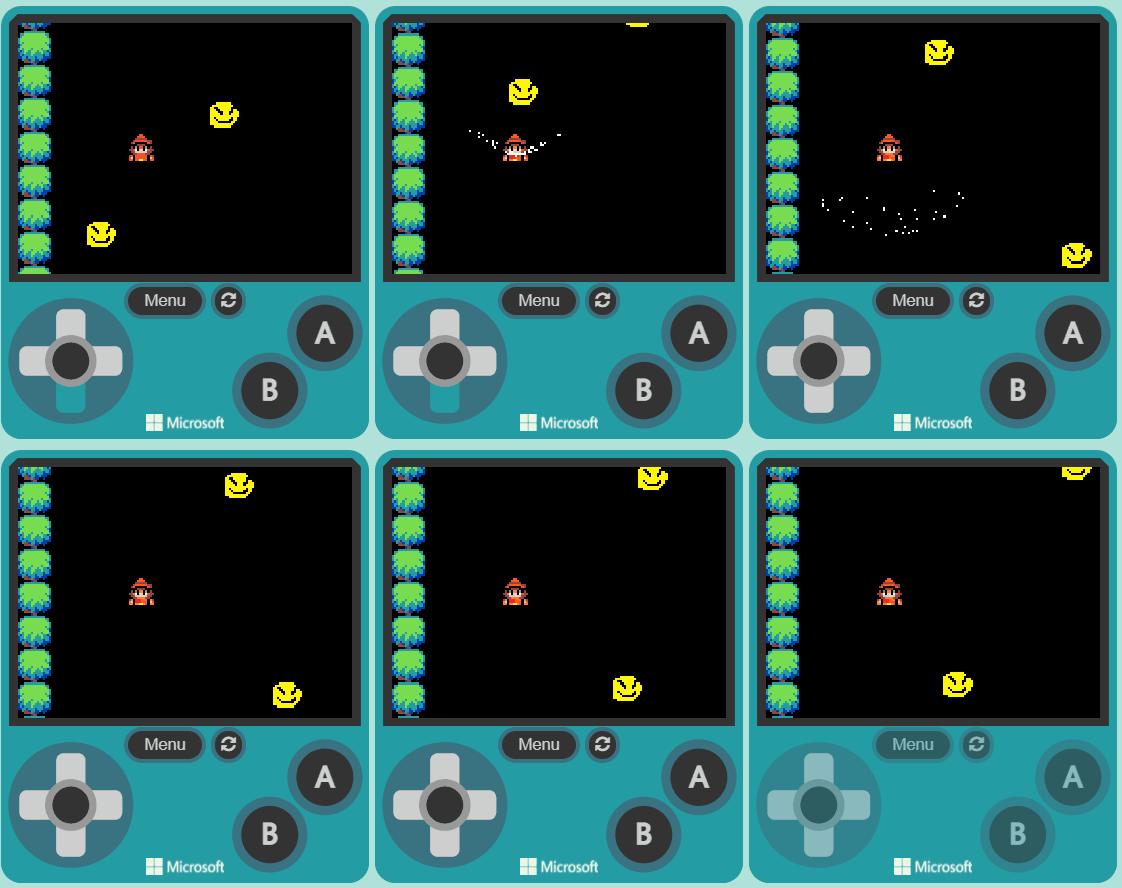
Now let's add some skill into the game. We're going to make a projectile fire across the map every 2 seconds. You will need to dodge them otherwise you'll lose a life if they hit you.
Add the following code to your project.
game.onUpdateInterval(2000, function () {
projectile = sprites.createProjectileFromSide(img`
. . . . . . . . . . . . . . . .
. . . . . . . . . . . . . . . .
. . . . . . . . . . . . . . . .
. . . . . . . . . . . . . . . .
. . . . . . . . . . . . . . . .
. . . . . . . . . . . . . . . .
. . . . . . . . . . . . . . . .
. . . . . . . . . . . . . . . .
. . . . . . . . . . . . . . . .
. . . . . . . . . . . . . . . .
. . . . . . . . . . . . . . . .
. . . . . . . . . . . . . . . .
. . . . . . . . . . . . . . . .
. . . . . . . . . . . . . . . .
. . . . . . . . . . . . . . . .
. . . . . . . . . . . . . . . .
`, 50, 50)
})
A projectile is a motion sprite that moves from the location it’s created at. It moves with speeds (velocities vx and vy) that you set in both the horizontal and vertical directions.
The side of the screen that the projectile starts from depends on the direction of the velocity values it’s given. The vx and vy velocities have either positive or negative values which determine the direction. The projectile starts from a side of the screen based on the velocity direction shown in the following table.
| Side | vx | vy |
|---|---|---|
| upper left | positive | positive |
| lower left | positive | negative |
| upper right | negative | positive |
| lower right | negative | negative |
After you have designed your projectile, add some (pick random) blocks into the vx and vy boxes as follows. This will randomise the speed and direction the projectiles come from.
game.onUpdateInterval(2000, function () {
projectile = sprites.createProjectileFromSide(img`
. . . . . . . . . . . . . . . .
. . . . . . . . . . . . . . . .
. . . . . 5 5 5 5 5 5 5 . . . .
. . . 5 5 5 5 5 5 5 5 5 5 . . .
. . 5 5 f f 5 5 5 5 5 5 f f . .
. . 5 5 5 f f 5 5 5 5 5 f 5 5 .
. . 5 5 5 5 f f 5 5 5 f f 5 5 5
. . 5 5 5 5 5 f 5 5 5 f 5 5 5 5
. . 5 5 5 5 5 5 5 5 5 5 5 5 5 5
. . 5 5 f 5 5 5 5 5 5 5 f 5 5 .
. . 5 5 5 f 5 5 5 5 5 f f 5 5 .
. . 5 5 5 5 f f f f f f 5 5 . .
. . 5 5 5 5 5 5 5 5 5 5 5 . . .
. . . . 5 5 5 5 5 5 5 5 . . . .
. . . . . . . . . . . . . . . .
. . . . . . . . . . . . . . . .
`, randint(-50, 50), randint(-50, 50))
})
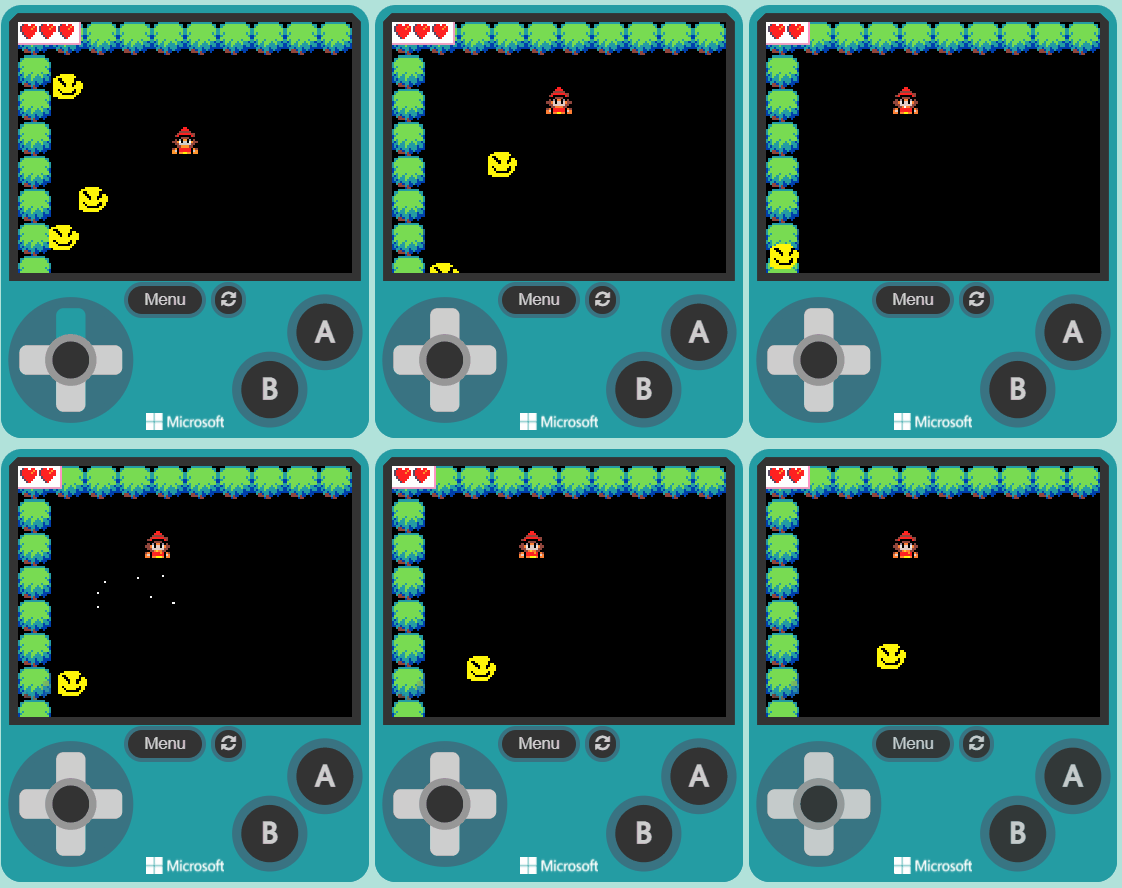
Now let's add some code to detect when a projectile hits your sprite (an overlap) and when it does play a sound and do an effect.
Add the following new code to your project.
sprites.onOverlap(SpriteKind.Player, SpriteKind.Projectile, function (sprite, otherSprite) {
music.powerDown.play()
mySprite.startEffect(effects.spray, 500)
})
let mySprite: Sprite = null
controller.moveSprite(mySprite)
tiles.setTilemap(tilemap`level3`)
scene.cameraFollowSprite(mySprite)
mySprite = sprites.create(img`
. . . . . . f f f f . . . . . .
. . . . f f f 2 2 f f f . . . .
. . . f f f 2 2 2 2 f f f . . .
. . f f f e e e e e e f f f . .
. . f f e 2 2 2 2 2 2 e e f . .
. . f e 2 f f f f f f 2 e f . .
. . f f f f e e e e f f f f . .
. f f e f b f 4 4 f b f e f f .
. f e e 4 1 f d d f 1 4 e e f .
. . f e e d d d d d d e e f . .
. . . f e e 4 4 4 4 e e f . . .
. . e 4 f 2 2 2 2 2 2 f 4 e . .
. . 4 d f 2 2 2 2 2 2 f d 4 . .
. . 4 4 f 4 4 5 5 4 4 f 4 4 . .
. . . . . f f f f f f . . . . .
. . . . . f f . . f f . . . . .
`, SpriteKind.Player)
At the moment we haven't set any lives for our game so add the following new code to:
sprites.onOverlap(SpriteKind.Player, SpriteKind.Projectile, function (sprite, otherSprite) {
music.powerDown.play()
mySprite.startEffect(effects.spray, 500)
info.changeLifeBy(-1)
otherSprite.destroy()
})
let projectile: Sprite = null
let mySprite: Sprite = null
info.setLife(3)
mySprite = sprites.create(img`
. . . . . . f f f f . . . . . .
. . . . f f f 2 2 f f f . . . .
. . . f f f 2 2 2 2 f f f . . .
. . f f f e e e e e e f f f . .
. . f f e 2 2 2 2 2 2 e e f . .
. . f e 2 f f f f f f 2 e f . .
. . f f f f e e e e f f f f . .
. f f e f b f 4 4 f b f e f f .
. f e e 4 1 f d d f 1 4 e e f .
. . f e e d d d d d d e e f . .
. . . f e e 4 4 4 4 e e f . . .
. . e 4 f 2 2 2 2 2 2 f 4 e . .
. . 4 d f 2 2 2 2 2 2 f d 4 . .
. . 4 4 f 4 4 5 5 4 4 f 4 4 . .
. . . . . f f f f f f . . . . .
. . . . . f f . . f f . . . . .
`, SpriteKind.Player)
controller.moveSprite(mySprite)
tiles.setTilemap(tilemap`level3`)
scene.cameraFollowSprite(mySprite)
game.onUpdateInterval(2000, function () {
projectile = sprites.createProjectileFromSide(img`
. . . . . . . . . . . . . . . .
. . . . . . . . . . . . . . . .
. . . . . 5 5 5 5 5 5 5 . . . .
. . . 5 5 5 5 5 5 5 5 5 5 . . .
. . 5 5 f f 5 5 5 5 5 5 f f . .
. . 5 5 5 f f 5 5 5 5 5 f 5 5 .
. . 5 5 5 5 f f 5 5 5 f f 5 5 5
. . 5 5 5 5 5 f 5 5 5 f 5 5 5 5
. . 5 5 5 5 5 5 5 5 5 5 5 5 5 5
. . 5 5 f 5 5 5 5 5 5 5 f 5 5 .
. . 5 5 5 f 5 5 5 5 5 f f 5 5 .
. . 5 5 5 5 f f f f f f 5 5 . .
. . 5 5 5 5 5 5 5 5 5 5 5 . . .
. . . . 5 5 5 5 5 5 5 5 . . . .
. . . . . . . . . . . . . . . .
. . . . . . . . . . . . . . . .
`, randint(-50, 50), randint(-50, 50))
})
That's it you've created your first game in Arcade, have fun playing it and try adding something new into the game.
If you do have an Arcade handheld computer download the code onto it so you can play it on the go!
Give your project a name and send it to your Arcade game console (i.e. BrainPad Arcade) by following these steps:
Every lesson in the course is ready to teach like this one. See what else comes with it, and how to order it.